Friday, April 2, 2010

Gardening: Growing Update

The past few days have been GORGEOUS - definitely with a capital 'G' - here in Detroit. I mean who would complain about mid-70's in Michigan at the end of March/start of April? Hopefully Mother Nature isn't playing some sort of April Fools' trick on me...
When I walked Riley around the neighborhood the other evening I could smell the grass and warm air and damp earth and it truly smelled like warm weather and Spring once again. (OK, besides the nice smells I also sneezed a little with the tree pollen that's suddenly appeared too). I even saw a bunch of active golf carts on the course next door. Ah to be out in the warmth and sunlight once again! Can you tell I'm excited?
So with all of this said, it's about that time of year again where I start giving you my garden/plant growing update. Although I don't plan to start as many seeds this year, there'll still be plenty to share with you.
Some Stonecrop Sedum is on its way up....
The Allium are getting closer to forming flower shoots...
Creeping Jenny is starting to turn green once again (many of you may recognize this as something people put in their window boxes and planters in the summer...you may not have realized it can be grown as a perennial).
Nothing nicer than some fuzzy Poppy leaves...makes me smile thinking about the pretty (though fleeting) bright pink, papery flowers they'll show me in a few months.
And the herb garden is starting to come back (do you know how tired I am of buying herbs all winter knowing I have all of these in my garden?!?)
Here's a small sampling...there are some Chives...

and Oregano

and Salad Burnet (it smells and tastes like cucumber!)

some Germander (can't say I've used this in anything yet...)

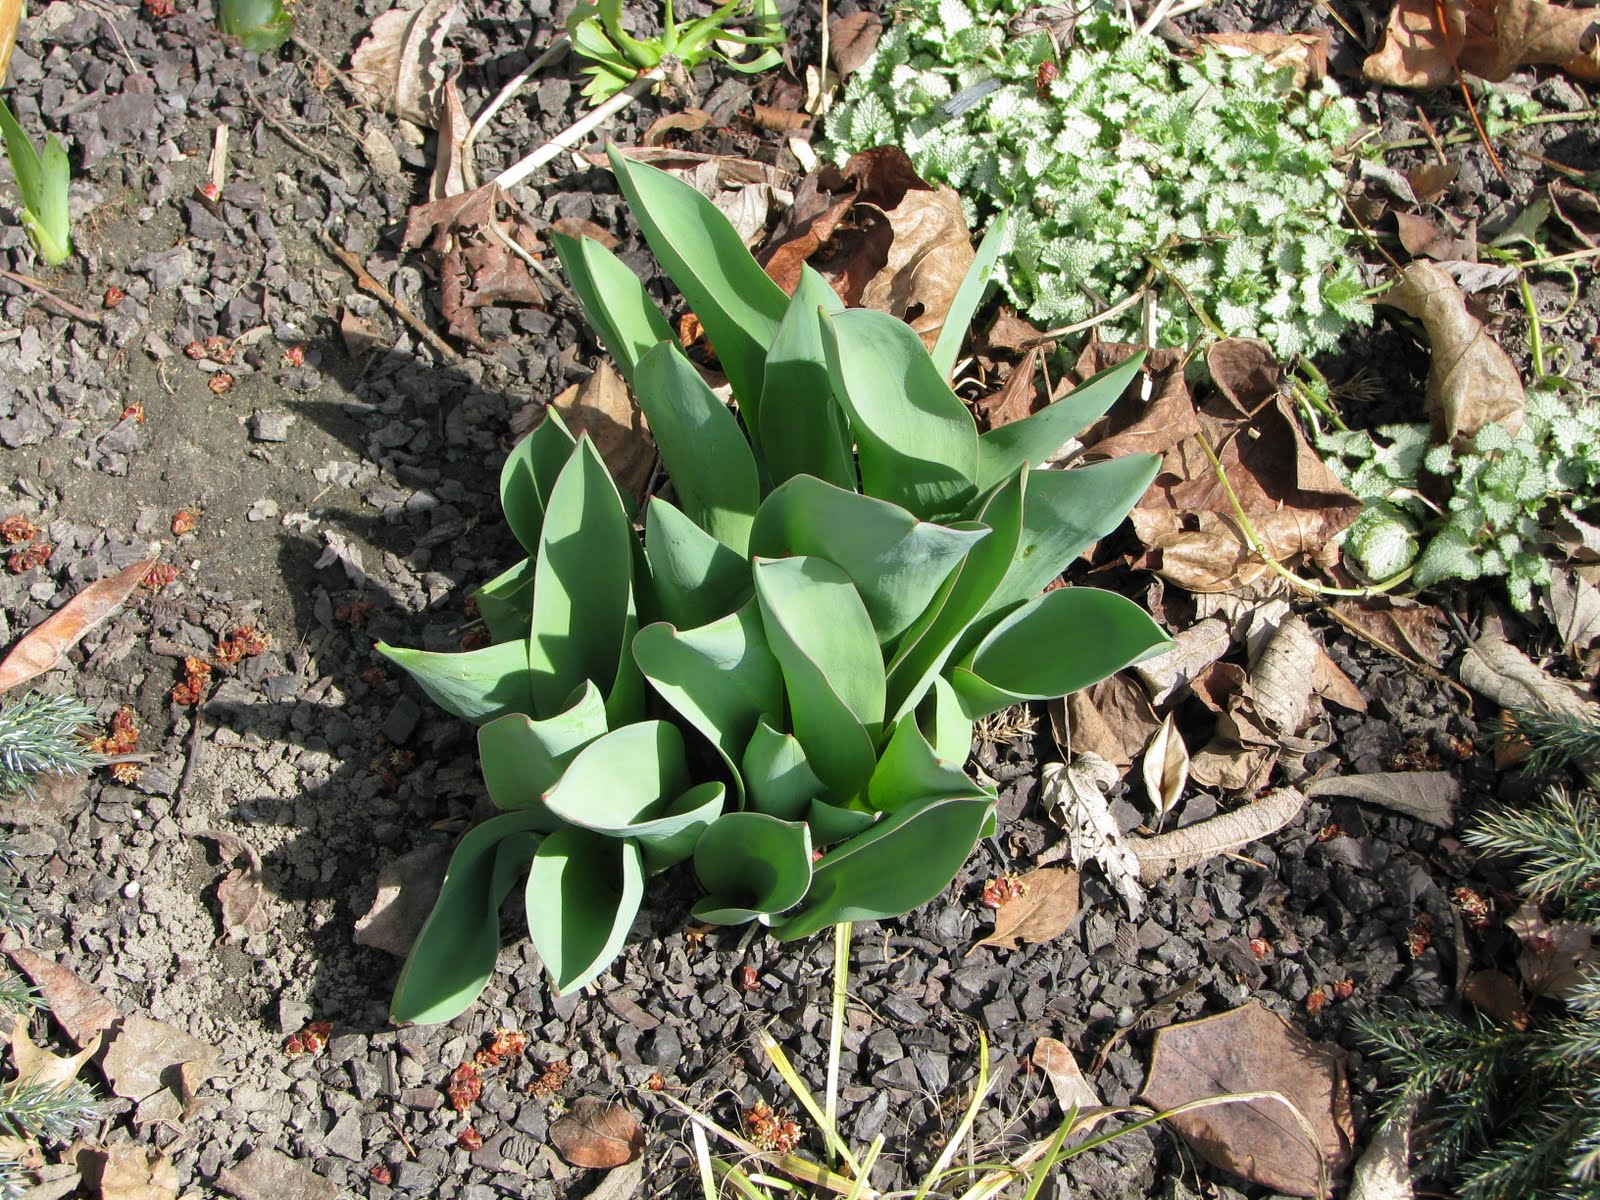
Spring Tulips are on their way up and out...

and my Peonies are showing the beginning signs of life.

Oh Rhubarb, I can't wait to cook up your tasty deliciousness...(so much better than what I can find in the grocery store)

And the smell of some gorgeous, fragrant Hyacinths...just in time for Easter Weekend.


Enjoy the pictures...hope they start to get you thinking and inspired to start some spring cleanup in the yard and flower beds...and start thinking about what you want to plant around the house this year. I know I can't wait!

Wednesday, March 31, 2010

Food: Oatmeal Pancakes

I love breakfast. But during the week my morning diet is pretty regular, consisting of cereal or a banana and raw nuts. But weekends? Saturdays and Sundays are reserved for something special. I mean what's more perfect than sleeping in, taking the dog for a nice long walk around the neighborhood (weather permitting, of course), and then coming back and having a warm, homemade, delicious breakfast with good company, a hot cup of tea, and the Wall Street Journal.

Although I love my waffle maker, lately I've been experimenting with pancakes. A couple of weekends ago I made some whole wheat apple cakes topped with fresh strawberries (I'll post the recipe once I tweak it a little bit more). And the variety I decided to make this past weekend are oatmeal. These are a little denser of a pancake than I've made before - even thicker than one of my favorite whole wheat from growing up. Although typically I like to make buttermilk pancakes (very traditional), this is a nice departure. And no, if you think pancakes should come out of a box or a whipped topping style can...you really must try to make them from scratch. They're not that difficult - no excuses.

When I first discovered this recipe, I couldn't believe how much butter was in it (Over a stick! Wow! I almost fell over!). So I decided to modify it significantly and only incorporate 1.5-2T of butter. It didn't seem to affect them a bit. The batter is pretty thick, so you can add a splash or two of skim milk if you'd like to thin it out a little...would probably result in slightly thinner cakes as well. They're even good cold, eaten right out of the fridge the next day (yes, I'm guilty of taking one out and eating it with my fingers).


Oatmeal Pancakes
Adapted from Orangette

INGREDIENTS
  • 2 cups old fashioned rolled oats
  • 2 cups buttermilk
  • 1/3 cup all-purpose flour
  • 4 T sugar
  • 1 t baking powder
  • 1 t baking soda
  • 1/2 t kosher salt
  • 2 extra large eggs, lightly beaten
  • 2 T unsalted butter, melted but not hot
  • Cooking spray to grease the pan
  • REAL maple syrup, for serving
DIRECTIONS
Evening Prior:
Combine the oats and buttermilk in a bowl. Stir to mix. Cover with plastic wrap, and refrigerate overnight.

Next Morning:
  • Remove the buttermilk/oatmeal mixture from the refrigerator. Set aside.
  • Add the eggs and melted butter to the bowl, stir well.
  • Add the flour, sugar, baking powder, soda, and salt. Stir to combine. If the mixture seems too thick, add a splash or two of skim milk.
  • Heat a nonstick griddle (or large skillet) over medium heat. Spray with cooking spray,
  • Allow to heat and then scoop out the batter into 3-4 inch puddles. When the top starts to bubble, check to see if the pancakes are ready to flip (the bottoms should be a nice, golden brown...but not deep brown).
  • Flip the pancakes and cook for a few minutes longer until the batter is fully cooked and both sides are a lightly toasted color.
  • Repeat process until you have gone through all of the batter. If the cakes seem to be browning too quickly, slightly turn down the heat.

Monday, March 22, 2010

Food: Tomato Pasta Bake

Jonathan's parents are coming into town and I plan to make this at some point over the weekend. Actually, I think it'll be the perfect thing for Saturday dinner since we're going to an early evening play at his niece and nephew's school...so we'll need a quick and hearty meal before the show.


I actually discovered this recipe by accident. For some reason, a couple of months ago, both Jonathan and I came home from the store (separate grocery trips) with Havarati cheese. It's not something we'd normally buy for a "dice into cubes and snack on" sort of cheese. And I don't think either one of us has ever made anything with it before. How on earth we both decided to buy it and bring it home on a whim, I have no idea. So...with two blocks of cheese in the fridge I decided I needed to find a way to use it up. A quick internet search for Havarati recipes resulted in this pasta dish. And this was more than a perfect recipe - so delish, hearty yet not too filling.


This "Tomato Pasta Bake" is more adult and less greasy than macaroni and cheese and more filling than just sauce and pasta. Yes, it's kind of crazy in the fact it uses THREE large cans of tomatoes (be sure to drain them first...I almost missed that step the first time I made it). But it's so easy...how could you resist? It also makes quite a lovely presentation even in a plain, old, glass pyrex baking dish. Add a glass of red wine and some fresh bread from the local bakery and you're good to go. Heck...even feel free to invite a few friends over for dinner. After all, what could be nicer than something that's quick, tasty, neatly presented, and even better with a bottle of wine and company?


Tomato Pasta Bake
Adapted from Epicurious

INGREDIENTS
  • 6 T olive oil
  • 1 large onion, chopped
  • 2 cloves of garlic, minced
  • 3, 28-oz cans of whole tomatoes, drained
  • 2 T dried basil
  • 1 1/2 t crushed red pepper
  • 2 c low sodium broth or stock (chicken or vegetable)
  • 14.5 oz protein enhanced, whole grain penne
  • 1 7-oz block of Havarati, grated
  • 1/3 c sliced, pitted, kalamata olives
  • 1/3 c grated, fresh Parmesan cheese
  • 1/4 c torn fresh basil
DIRECTIONS
  • Heat 3 T of oil in a deep pot over medium-high (a Dutch or French Oven works great for this). Add onion and garlic and saute until onion is translucent (5-8 minutes).
  • Mix in drained tomatoes, dried basil, and crushed red pepper. Bring to a boil, crushing tomatoes with the back of a wooden spoon (be careful not to splatter as the liquid will be very hot).
  • Add broth to the pot and bring to a boil. Reduce heat to medium and simmer until mixture resembles a chunky sauce, about 1 hour. Stir occasionally.
  • Preheat oven to 375. Cook pasta per directions on box, drain well and toss with 3 T of olive oil.
  • Pour pasta into pot with sauce. Mix in Havarati cheese. Toss to coat and then transfer pasta into a 13x9x2" glass baking dish. Sprinkle with olives (if desired) and then with parmesan cheese.
  • Bake pasta for 30 minutes or until heated through. Sprinkle with fresh basil prior to serving.

Friday, March 19, 2010

Gardening: The First Sign of Spring

You can't imagine how excited I'm getting this week here in Detroit...the sun is shining, it's getting close to 60 degrees outside...and the first peeks of spring flowers are starting to appear! Welcome back Spring!!!

Saturday, March 6, 2010

Food: Turkey Breast Roulade

This morning when I went outside, I saw one of the first true signs of Spring. Sure, the birds have been chirping more in the mornings and the sun is rising sooner and setting later and the snow is finally starting to melt with daily temperatures in the 40's (can't believe I'm excited about 40-degree weather)! But the real indication of Spring was just outside my front door...the first peeks of a hyacinth rising from the ground. I couldn't have been more excited. Seeing this sent me into daydreams of late spring flower planting and summer vegetable harvests and the smell of freshly cut grass. But I digress....I'm getting ahead of myself and the season...back to the coming of Spring.

With the arrival of Spring, many of our minds are filled with thoughts of Easter. After all, it's been the Lenten season for a few weeks now. And if any of you have checked your calendars lately or started planning trips to visit relatives over the holiday, you've probably realized that the holiday is less than a month away! Oh my, that's really soon!

An Easter tradition for many of us includes a morning filled with family, church, and Easter egg hunts followed by a lovely afternoon meal. And although ham is generally a common main dish for a lot of folks, if you're having a smaller gathering this year, I recommend making a little change to your menu. This year, try serving turkey roulade. "Oh, that sounds too fancy and difficult," you might say. But honestly, it's really simple and the smell of apricots, golden brown turkey, walnuts and sherry is nothing short of heavenly. Unlike Thanksgiving, this turkey doesn't need all the rich sides like stuffing and candied sweet potatoes and cranberry relish. There's so much flavor in it, it'd be perfect served with some uncomplicated, oven-roasted sweet potatoes (olive oil, a sprinkle of kosher salt, coarsely cracked pepper), tender green beans, and a simple roll with a twist like these light and fluffly coconut bread rolls. Is your mouth watering yet?


Apricot Stuffed Turkey Breast Roulade
Adapted from: Better Homes and Gardens

INGREDIENTS
  • 1, 2-to 2-1/2-pound boneless turkey breast half
  • 1-1/2 cups soft bread crumbs (2 slices of fresh bread pulsed in the food processor)
  • 1/2 cup chopped dried apricots*
  • 1/4 cup chopped toasted pecans*
  • 2 tablespoons dry sherry
  • 1/2 teaspoon fresh rosemary leaves, chopped
  • 1/4 teaspoon garlic salt
  • 1 tablespoon Dijon-style mustard
  • 4 tablespoons olive oil
  • 1/2 c low sodium chicken broth or stock
DIRECTIONS
  • Preheat oven to 325F
  • Butterfly turkey breast and place between two sheets of saran wrap or wax paper
  • Pound meat to about 3/4 inch thickness
  • Slice into 3-4" wide strips and pound slightly thinner to even each strip out
  • In a mixing bowl combine bread crumbs, apricots, pecans, garlic salt, sherry, rosemary, and 2 T olive oil, mixing well
  • Spoon "stuffing" on the flattened turkey breast strips, starting from the center and spreading out to cover the strip, leaving a border around the edge
  • Fold the side edges of the strips in and roll from one end to the other, securely fastening the opening with toothpicks or tie with heavy string
  • Stir together mustard and 1 T oil; set aside
  • Place a large, oven-safe skillet on the stovetop, add 1 T olive oil and pre-heat to medium-high heat
  • When the oil is hot, add turkey roulades, cooking until golden, about 2-3 minutes per side
  • Pour the chicken broth/stock over the turkey
  • Brush the tops of the turkey with the mustard-oil mixture
  • Move the skillet to the oven and cook until the turkey breast registers 170 degrees F, about 45 minutes
  • Remove from the oven and let the dish stand for a few minutes prior to slicing the turkey breast
* MM Tip: A small food processor works well to chop the two of these ingredients at one time without your hands getting sticky from the apricots

Saturday, February 27, 2010

Food: Homemade S'mores

We all have the habit of buying items at the grocery store that we really actually could make for ourselves at home. I suppose we could use the excuse that it's a convenience thing, but in most cases it's probably laziness or lack of time or even ignorance. For example, until recently I had no idea I could make graham crackers at home! I hadn't ever thought about it! So...what could be better than making something from scratch that you normally find in a box or a bag at the store?

For Valentine's Day this year I decided instead of a fancy dessert, I wanted to make something nostalgic. So, remembering a s'mores dessert on the menu of a restaurant we recently visited, I chose to make homemade s'mores (OK, so they were only 2/3 homemade, since I didn't want to mess with chocolate this time around). I know some of you may not think of this as a romantic dessert. After all, s'mores are a campfire treat...something you would make with marshmallows you've skewered on an unsterilized branch and held over a smoking fire trying to lightly toast into a beautiful brown but usually torching into a black outer shell instead. All while avoiding mosquitos and trying to catch a glimpse of the stars...and in the end wiping sticky marshmallow goo and melted chocolate off your chin. But trust me, there's something very romantic about making things from scratch. Especially surprising things from scratch...like things you normally buy in a bag or a box and have never truly had "fresh from the oven."

I've been intrigued by the concept of making marshmallows for quite some time now but hadn't been brave enough to try them. But my friend Kippy reassured me they were super easy. So off I went. They are simple, but getting them out of the mixer and into the pan is quite a difficult and sticky process (Or rather, if I'm completely honest, a gigantic heap of gummy chaos). A wet or cooking spray-coated spatula definitely helps to get them out of the bowl and off of the attachment as well as smoothing them out into a rectangular slab. Also, once they're cooled, when cutting, dampen your knife with cooking spray and then coat with the corn starch/powdered sugar mixture. This should help you cut easily through the block of marshmallow rather than having them all stick to the knife.

Graham crackers are even simpler to throw together although the end process of forming the crackers takes a little patience. And if you were wondering what makes up graham cracker flavor, it's honey, dark brown sugar (molasses), and butter. Who knew! Graham dough is super, super easy in a mixer. And I'll admit, this first attempt didn't result in flat rectangles like I had hoped and some of the "stamped" detailing disappeared when I baked them. I suspect I wasn't patient enough in leaving them in the freezer prior to baking and maybe didn't roll them out flat enough. But that sure didn't affect the flavor. They sure did smell and taste like graham...and they were so much better fresh out of the oven rather than slid out of a cardboard box.

I'll have s'more please...


Graham Crackers

Adapted from Smitten Kitchen

INGREDIENTS

  • 1 c all-purpose flour
  • 1 c whole-wheat pastry flour
  • 1 c dark brown sugar, lightly packed
  • 1 t baking soda
  • 1/2 t kosher salt
  • 1 stick unsalted butter, cut into 1-inch cubes and frozen
  • 1/3 cup honey
  • 5 T milk
  • 2 T pure vanilla extract

DIRECTIONS

  • Make the dough: Combine the flour, brown sugar, baking soda, and salt in the bowl of an electric mixer fitted with the paddle attachment. Mix on low to incorporate. Add the butter and pulse on and off on and off, until the mixture is the consistency of a coarse meal.
  • In a small bowl, whisk together honey, milk, and vanilla extract. Add to the flour mixture and pulse on and off a few times until the dough barely comes together. It will be very soft and sticky. Lay out a large piece of plastic wrap and dust it lightly with flour, then turn the dough out onto it and pat it into a rectangle about 1-inch thick. Wrap it, then chill it until firm, a couple of hours or overnight.
  • Roll out the "crackers": Divide the dough in half and return one half to the refrigerator. Sift an even layer of flour onto the work surface and roll the dough into a long rectangle about 1/8 inch thick. The dough will be sticky, so flour as necessary. Use side of the rolling pin to even out the edges of the rectangle. Then cut the rectangle width-wise into several smaller rectangle "crackers."
  • Place the crackers parchment-lined baking sheets. Chill until firm, about 30 to 45 minutes in the fridge or 15 to 20 minutes in the freezer. Repeat with the second batch of dough. Finally, gather any scraps together into a ball, chill until firm, and re-roll.
  • Adjust the oven rack to the upper and lower positions and preheat the oven to 350°F.
  • Decorate the crackers: Mark a vertical line down the middle of each cracker, being careful not to cut through the dough. Using a toothpick, prick the dough to form two dotted rows about 1/2 inch for each side of the dividing line.
  • Bake for 15 minutes, until browned and slightly firm to the touch, rotating the sheets halfway through to ensure even baking.
  • Allow to cool on the cookie sheet for a couple of minutes prior to moving to a cooling rack.
Marshmallows
Adapted from
Epicurious

INGREDIENTS

  • Nonstick vegetable oil spray
  • 1 cup cold water, divided
  • 3 1/4-ounce envelopes unflavored gelatin
  • 2 cups sugar
  • 2/3 cup corn syrup
  • 1/4 teaspoon salt
  • 2 teaspoons vanilla extract
  • 1/2 cup corn starch
  • 1/2 cup powdered sugar
DIRECTIONS
  • Line 13x9x2-inch glass dish with foil. Coat foil lightly with nonstick spray.
  • Pour 1/2 cup cold water into bowl of heavy-duty mixer fitted with whisk attachment. Sprinkle gelatin over water. Let stand until gelatin softens and absorbs water, at least 15 minutes.
  • Combine 2 cups sugar, corn syrup, salt, and remaining 1/2 cup cold water in heavy medium saucepan. Stir over mediumlow heat until sugar dissolves, brushing down sides of pan with wet pastry brush. Attach candy thermometer to side of pan. Increase heat and bring syrup to boil. Boil, without stirring, until syrup reaches 240°F, about 8 minutes.
  • With mixer running at low speed, slowly pour hot syrup into gelatin mixture in thin stream down side of bowl (avoid pouring syrup onto whisk, as it may splash). Gradually increase speed to high and beat until mixture is very thick and stiff, about 10 minutes. Add vanilla and beat to blend, about 30 seconds longer.
  • You will now have a big sticky mass in the mixing bowl and on the attachment. Using a spatula sprayed with cooking spray, scrape marshmallow mixture into prepared pan (this is the most difficult part of the process...since the marshmallow is very sticky). Smooth the top out with a wet spatula. Let stand uncovered at room temperature until firm, about 4 hours.
  • Stir corn starch and powdered sugar in small bowl to blend. Sift generous dusting of starch-sugar mixture onto large cutting board. Turn marshmallow slab out onto starch-sugar mixture and peel off foil. Spread more starch-sugar mixture over marshmallow slab.
  • Coat large sharp knife (or cookie cutters) with nonstick spray and then starch-sugar mixture. Cut marshmallows into squares or other shapes. Toss each in remaining starch-sugar mixture to coat. Transfer marshmallows to rack, shaking off excess mixture.
  • Store in an airtight container to preserve freshness.

Friday, February 12, 2010

Food: Celery Root, Fennel, and Apple Salad with Dijon Vinaigrette and Hazelnuts

Hearty, crunchy, crisp, slightly sweet, nutty...all words to describe the fabulous salad I made last weekend. I was inspired by Molly's latest creation in Bon Appetit this past month. It sounded unique - besides the fact I had been curious about the ugly looking celery root in my grocery store the past few visits. I did modify the recipe, adding an extra apple (and changing from Gala to my favorite sweet-tart-crisp Pink Lady) and since I didn't have hazelnut oil or feel like driving to a specialty food store to get it, I decided to slightly modify the dressing and added roughly chopped hazelnuts in the salad. Actually I rather liked the crunch, texture and color the hazelnuts provided to the salad...I think the color may have been too monotone without them. It also would be pretty to sprinkle some chopped fennel tops over the dish.

Even though I made this salad on a cold winter day, I think it would be a great hearty salad in the summer since everything in it is cool and juicy. Actually it would make me feel pretty good to have this on a beach day where I wanted something cold, healthy, yet filling. (I'm especially thinking about this seeing all of the snow everyone's been getting over the past week).

Also, to you gardeners out there looking for something that keeps over the winter months (or people who are intrigued by something and end up buying things at the grocery store they don't use right away (myself included)), apparently celery root lasts for several months in the fridge or a cold cellar...so feel free to buy one to have on hand.

Celery Root, Fennel, and Apple Salad with Dijon Vinaigrette & Hazelnuts
Adapted from Bon Appetit (Molly Wizenberg) - February 2010

INGREDIENTS

Vinaigrette
  • 2 T Dijon mustard
  • 2 T fresh lemon juice
  • 1 t garlic, minced
  • Salt and pepper to taste
  • 1/4 c olive oil
Salad
  • 1 celery root, peeled, cut into matchstick-size strips
  • 1 fennel bulb, halved lengthwise, thinly sliced
  • 2 unpeeled Pink Lady apples, cored, cut into strips
  • 1/3 c hazelnuts, roughly chopped
  • Top with freshly shaved Parmesan cheese (MM Tip: Use a veggie peeler to get nice curls of parmesan)
DIRECTIONS
  • For the vinaigrette, whisk together all of the ingredients except the oil in a small bowl. When those are mixed, slowly whisk in the olive oil.
  • Combine all of the salad ingredients in one bowl. Toss with vinaigrette. Top with shaved parmesan.

Related Posts with Thumbnails